My Three Favourite Yoga Poses to Off-Set the Desk Job
As a lawyer, I spend a lot of time sitting. If you also spend a lot of your day behind a desk, these three yoga poses might assist you to off-set the potential negative impacts to the back caused by sitting for long periods of time.
I invite you to practice these poses and stay in them for at least five long breaths.
Downward Dog Pose (Adho Mukha Svanasana)
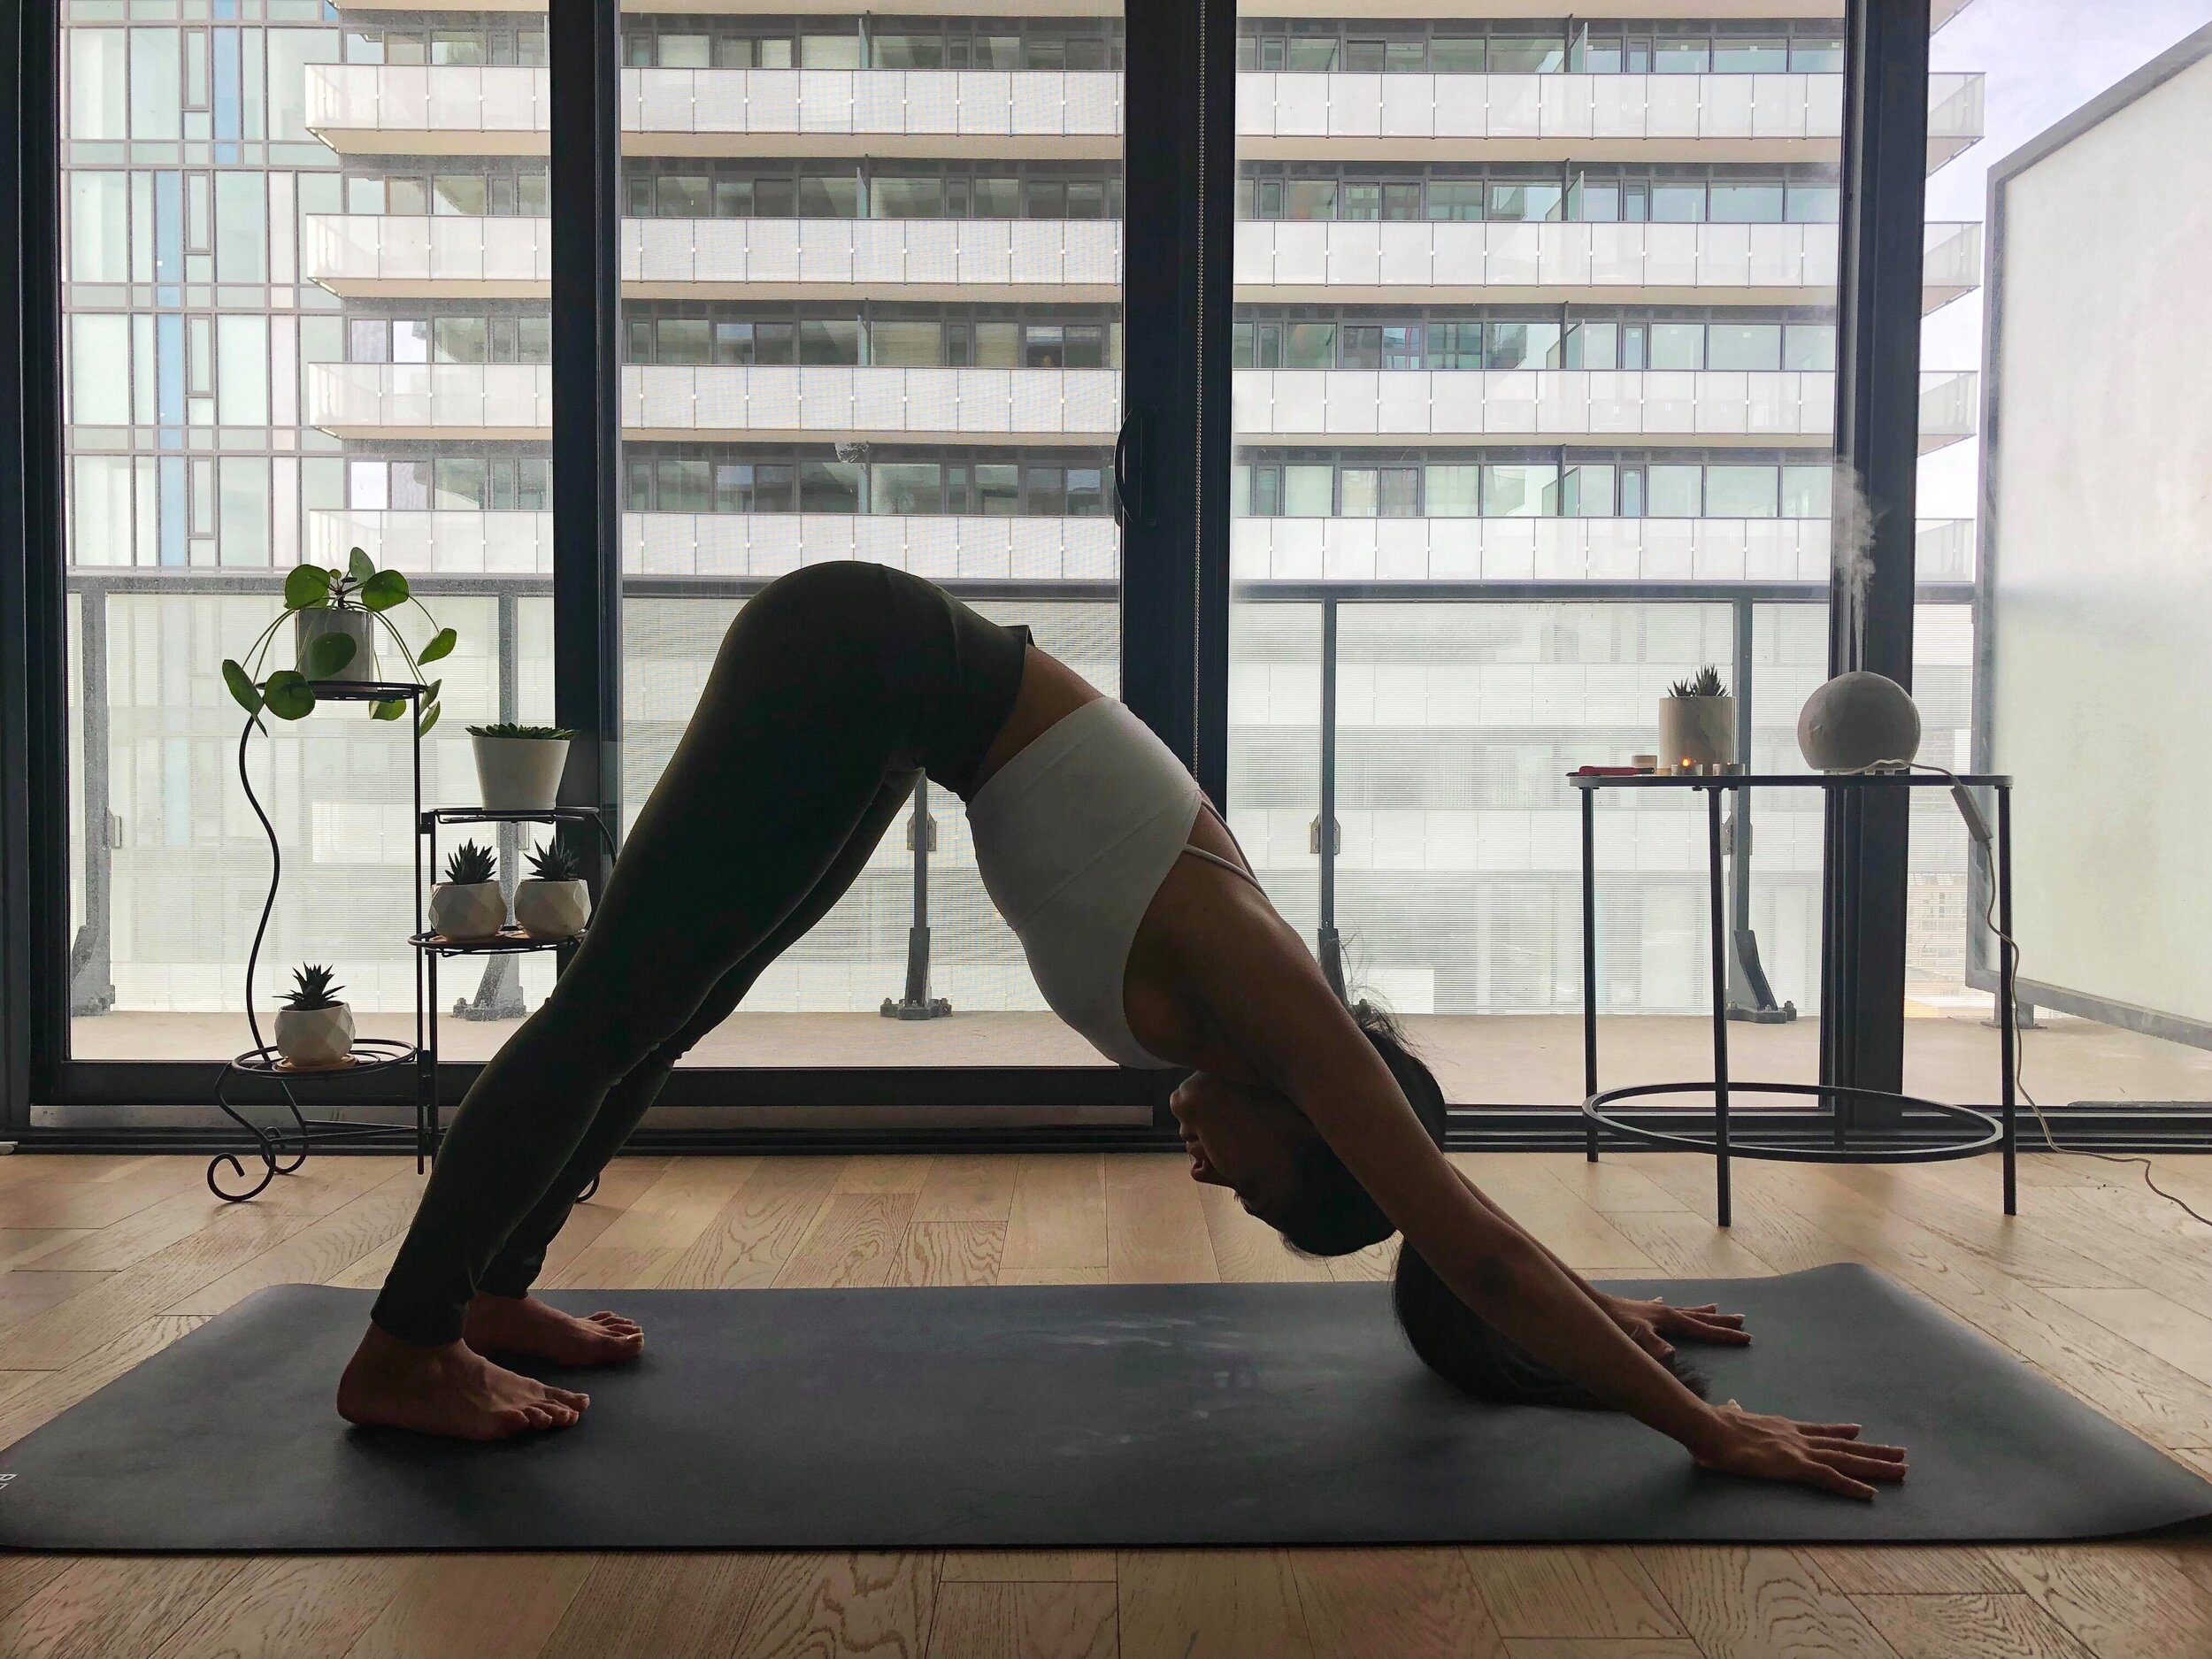
This is a foundational asana in hatha yoga, and can offer tremendous back relief if you practice its full expression. My favourite way to transition into downward dog is either through Plank Pose or by laying stomach-down on my mat. If you’re a beginner yogi I recommend the latter approach.
To Practice:
Keep your knees hip-width distance apart and bring your palms right beside your shoulders, firmly pressing them onto your mat. Keep your fingers spread wide apart to evenly distribute your weight between your hands and stabilize your wrists to protect them from injury. Next, tuck in your toes, lift your knees, and raise your pelvis up and back. Motion yourself such that you’re pushing the ground away from you. Rotate your upper arms outwards to broaden your shoulders and bring your neck in line with your spine. Use the muscles in your thighs to send your knees back. If you can extend the backs of your legs so that your heels reach the mat, that is great! If not, that is also great, because hey! You are on your mat practicing and should be proud of yourself for that. If your heels do not touch the ground in Downward Dog, no problem at all – a little bend in the knees is welcome if your upper body is extended and your lower back is lengthened (not rounded) and in its natural alignment.
Why I like Downward Dog pose:
Relieves back pain by neutralizing the spine
Builds strength in the back and shoulders
Reduces tension in the neck
Practicing foundational poses is essential to building your yoga practice
Seal Pose (Bhujangasana Yin Variation)
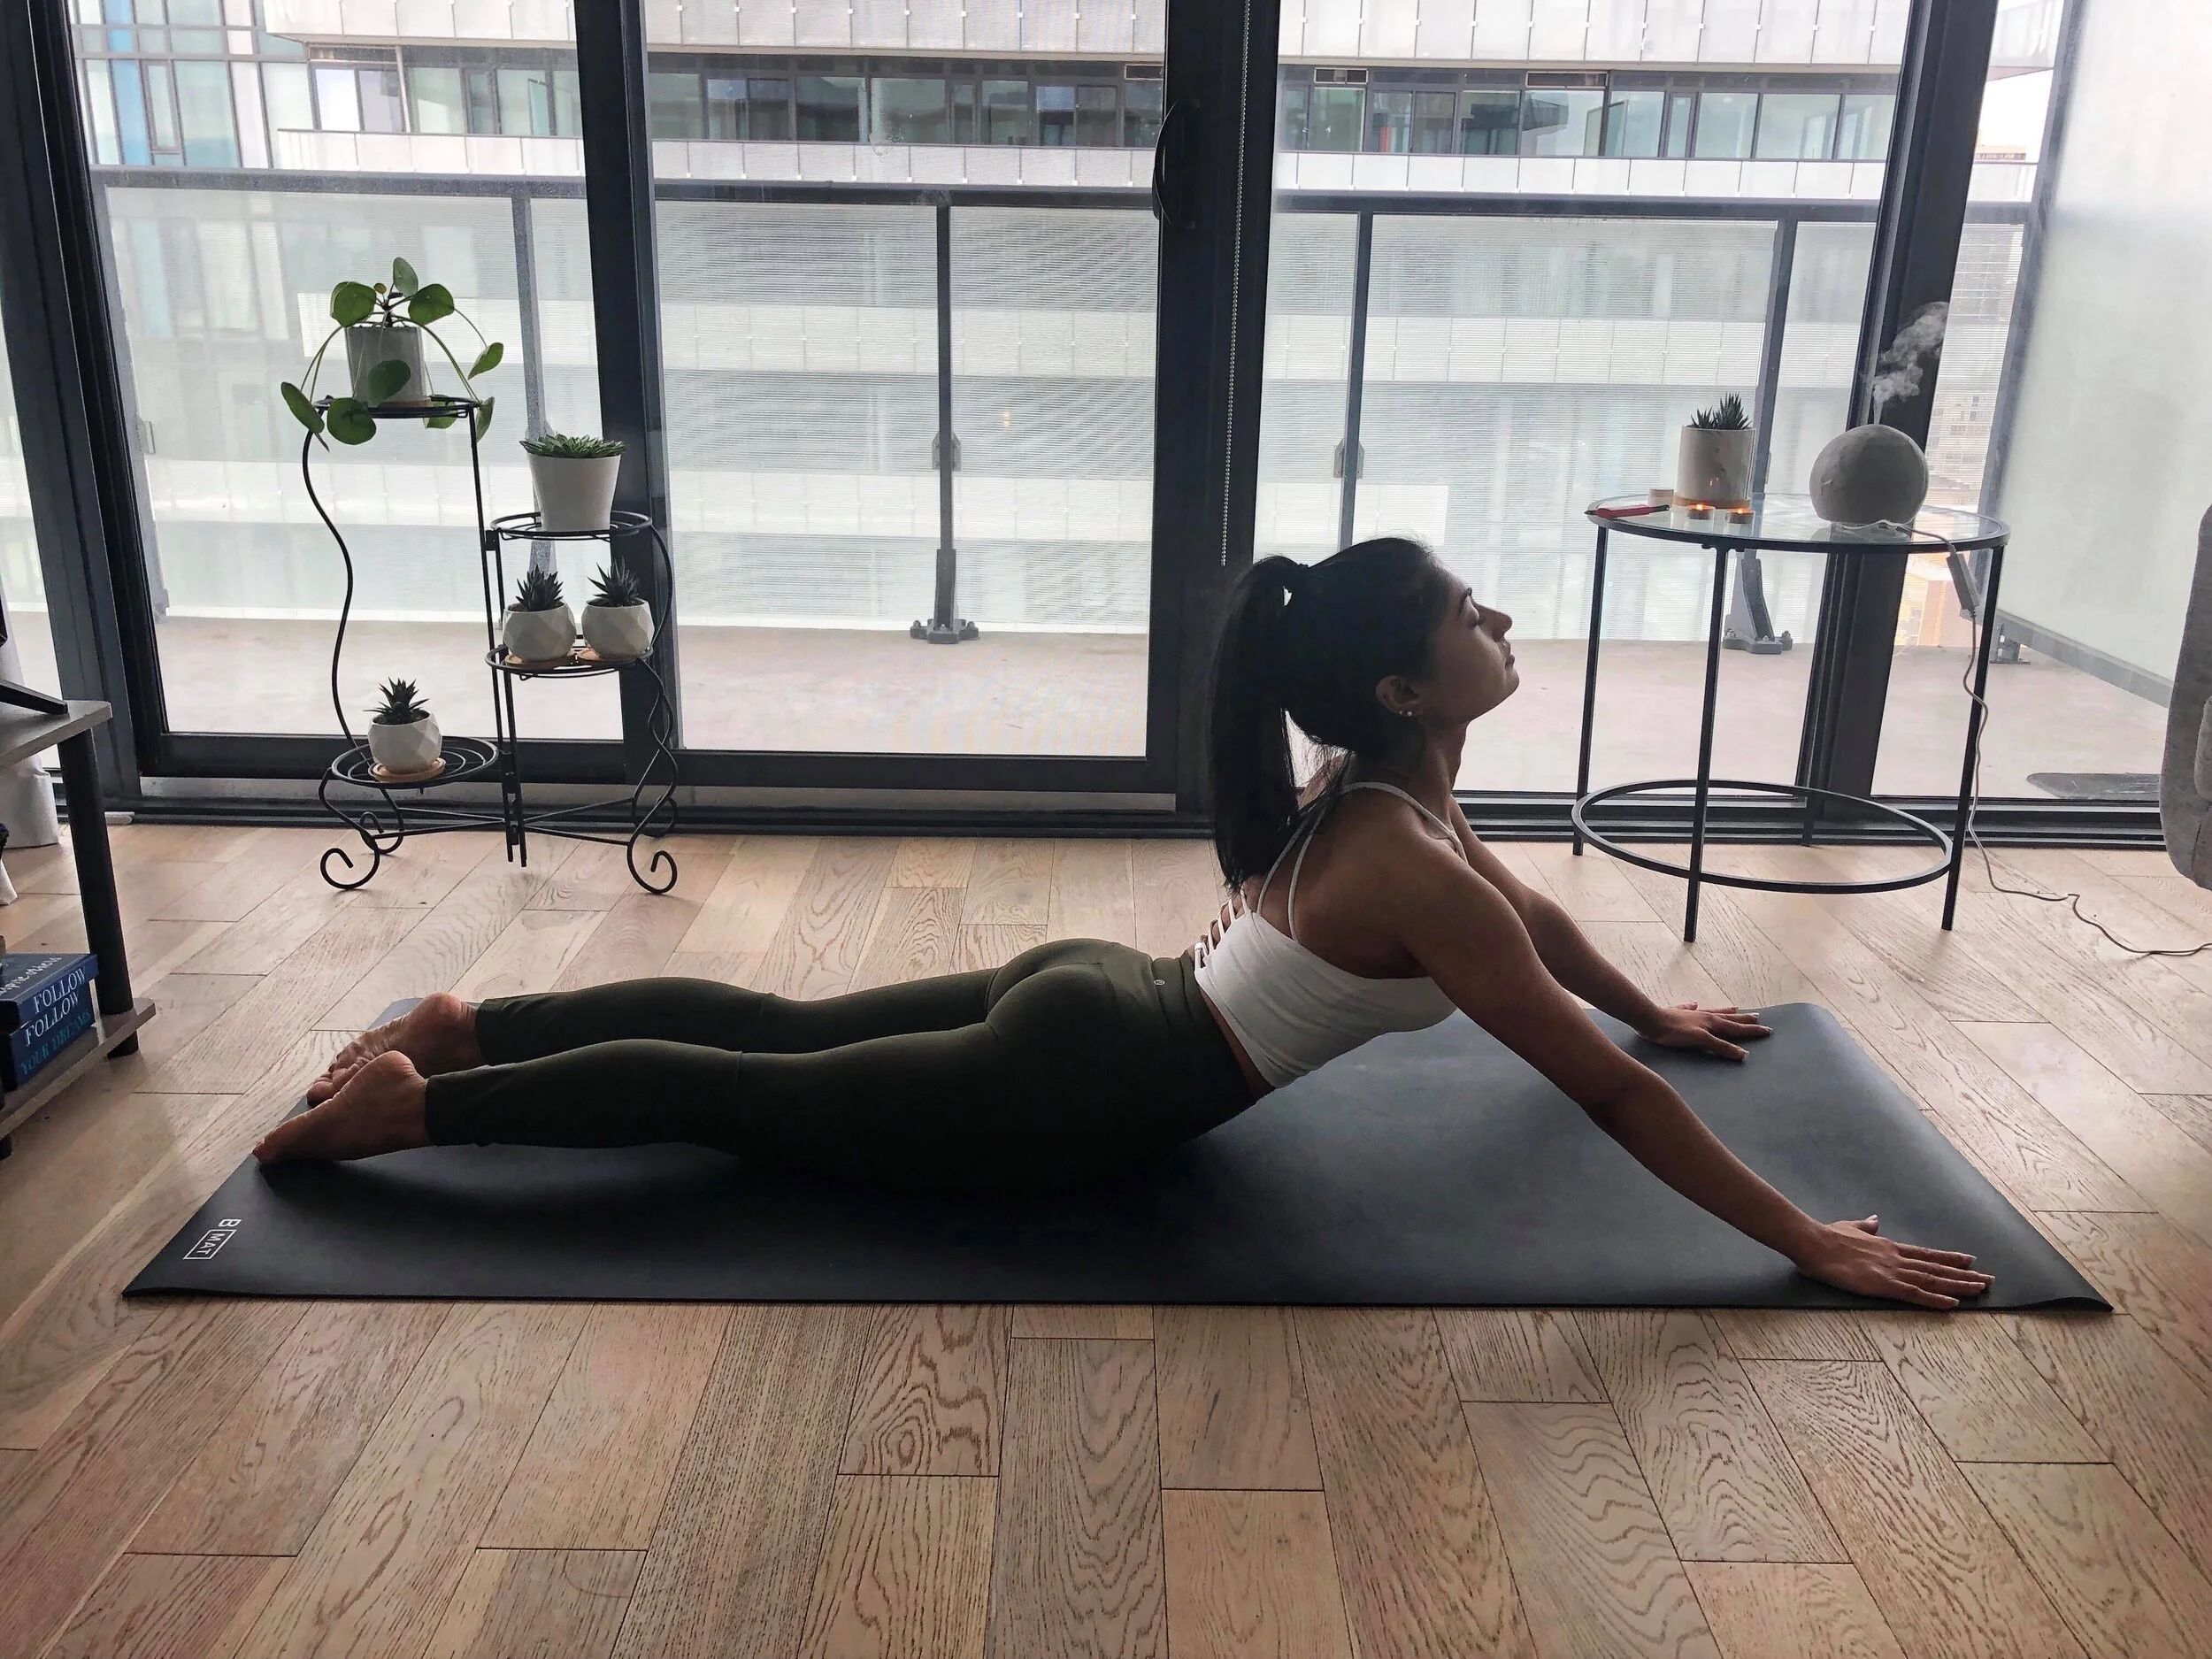
Seal Pose is similar to Cobra Pose except your arms are lengthened, extended and spread wide. This pose is commonly found in Yin yoga classes, in which poses are typically held for 3-5 minutes (on each side if applicable). I enjoy practicing Yin yoga at the end of the day because it calms my mind and is a wonderful precursor to bedtime. You’ll find that yoga teachers often recommend practicing Yin yoga first thing in the morning when the muscles are unfatigued—I will expand on this in a future blog post. Stay tuned for a “Benefits of Yin Yoga Practice” post coming up!
To Practice:
Start by laying down on your stomach with your feet comfortably apart (I usually have my feet about hip-distance apart). Bring your palms flat on to your mat and widen your fingers, again to evenly distribute your weight between your hands. Extend your arms out straight and place your palms on or near the corners of your mat. Adjust the distance between your hands and hips to sensationalize the pose to your needs. Bring your hands forward to feel greater pressure and a deeper sensation in your lower back. Move your hands further apart to reduce the sensation. While practicing Seal Pose, you may choose keep your neck neutral or adjust it forwards.
Why I like Seal Pose:
Very therapeutic for the lower back as the pose reinstates the natural arc in the lumbar spine
Strengthens spinal flexibility
Bridge Pose (Setu Bandha Sarvangasana)

Bridge pose is one of the most versatile asanas, and may be incorporated into heated Vinyasa flow classes or into cooling Yin/Restorative yoga classes. I will adapt different variations of bridge pose depending on the day and how my body feels, but my favourite way to practice this pose is in its Yin/Restorative variation. Using a prop to practice Bridge pose turns the active backbend into a restorative asana.
To Practice:
Before you begin find a yoga block, bolster or pillow(s), and keep your chosen prop beside your mat so you can comfortably reach it.
Begin by laying flat on your back. Then prop yourself up on the soles of your feet such that your knees are directly above your ankles and your arms are close to your sides, resting on your mat along your spine. Keep your feet parallel to one another. You should be able to just graze the backs of your heels with your fingertips. Actively press into the soles of your feet, distributing your weight evenly to lift your hips up off the earth with strength and control. Then, gently place the yoga block, bolster or pillow(s) underneath your pelvic bone (right beneath your sacrum) at whatever height is comfortable. Relax your neck and throat to adjust into the pose. If you notice that you’re clenching your jaw, un-clench and relax your facial muscles. Stay here for 3-5 minutes if you are able to.
Why I like Bridge (and Supported Bridge) Pose:
Engages and rejuvenates the thoracic spine (mid-upper back)
Relieves the “hunch” in the back, often caused by sitting for long periods of time
Increases spinal flexibility and mobility
This pose has several different variations and many options exist to increase or reduce the pose’s intensity, depending on how your body feels (versatility goes a long way)